 AppVerz
Blog / 6 November 2026
Your Mac's disk is almost full. Here is the order to free it in
Look before you delete, take the reversible wins first, hand space back to iCloud, clear what your tools rebuild, then go after the big files, and empty the Trash last, because until you do, nothing you removed has freed a byte.
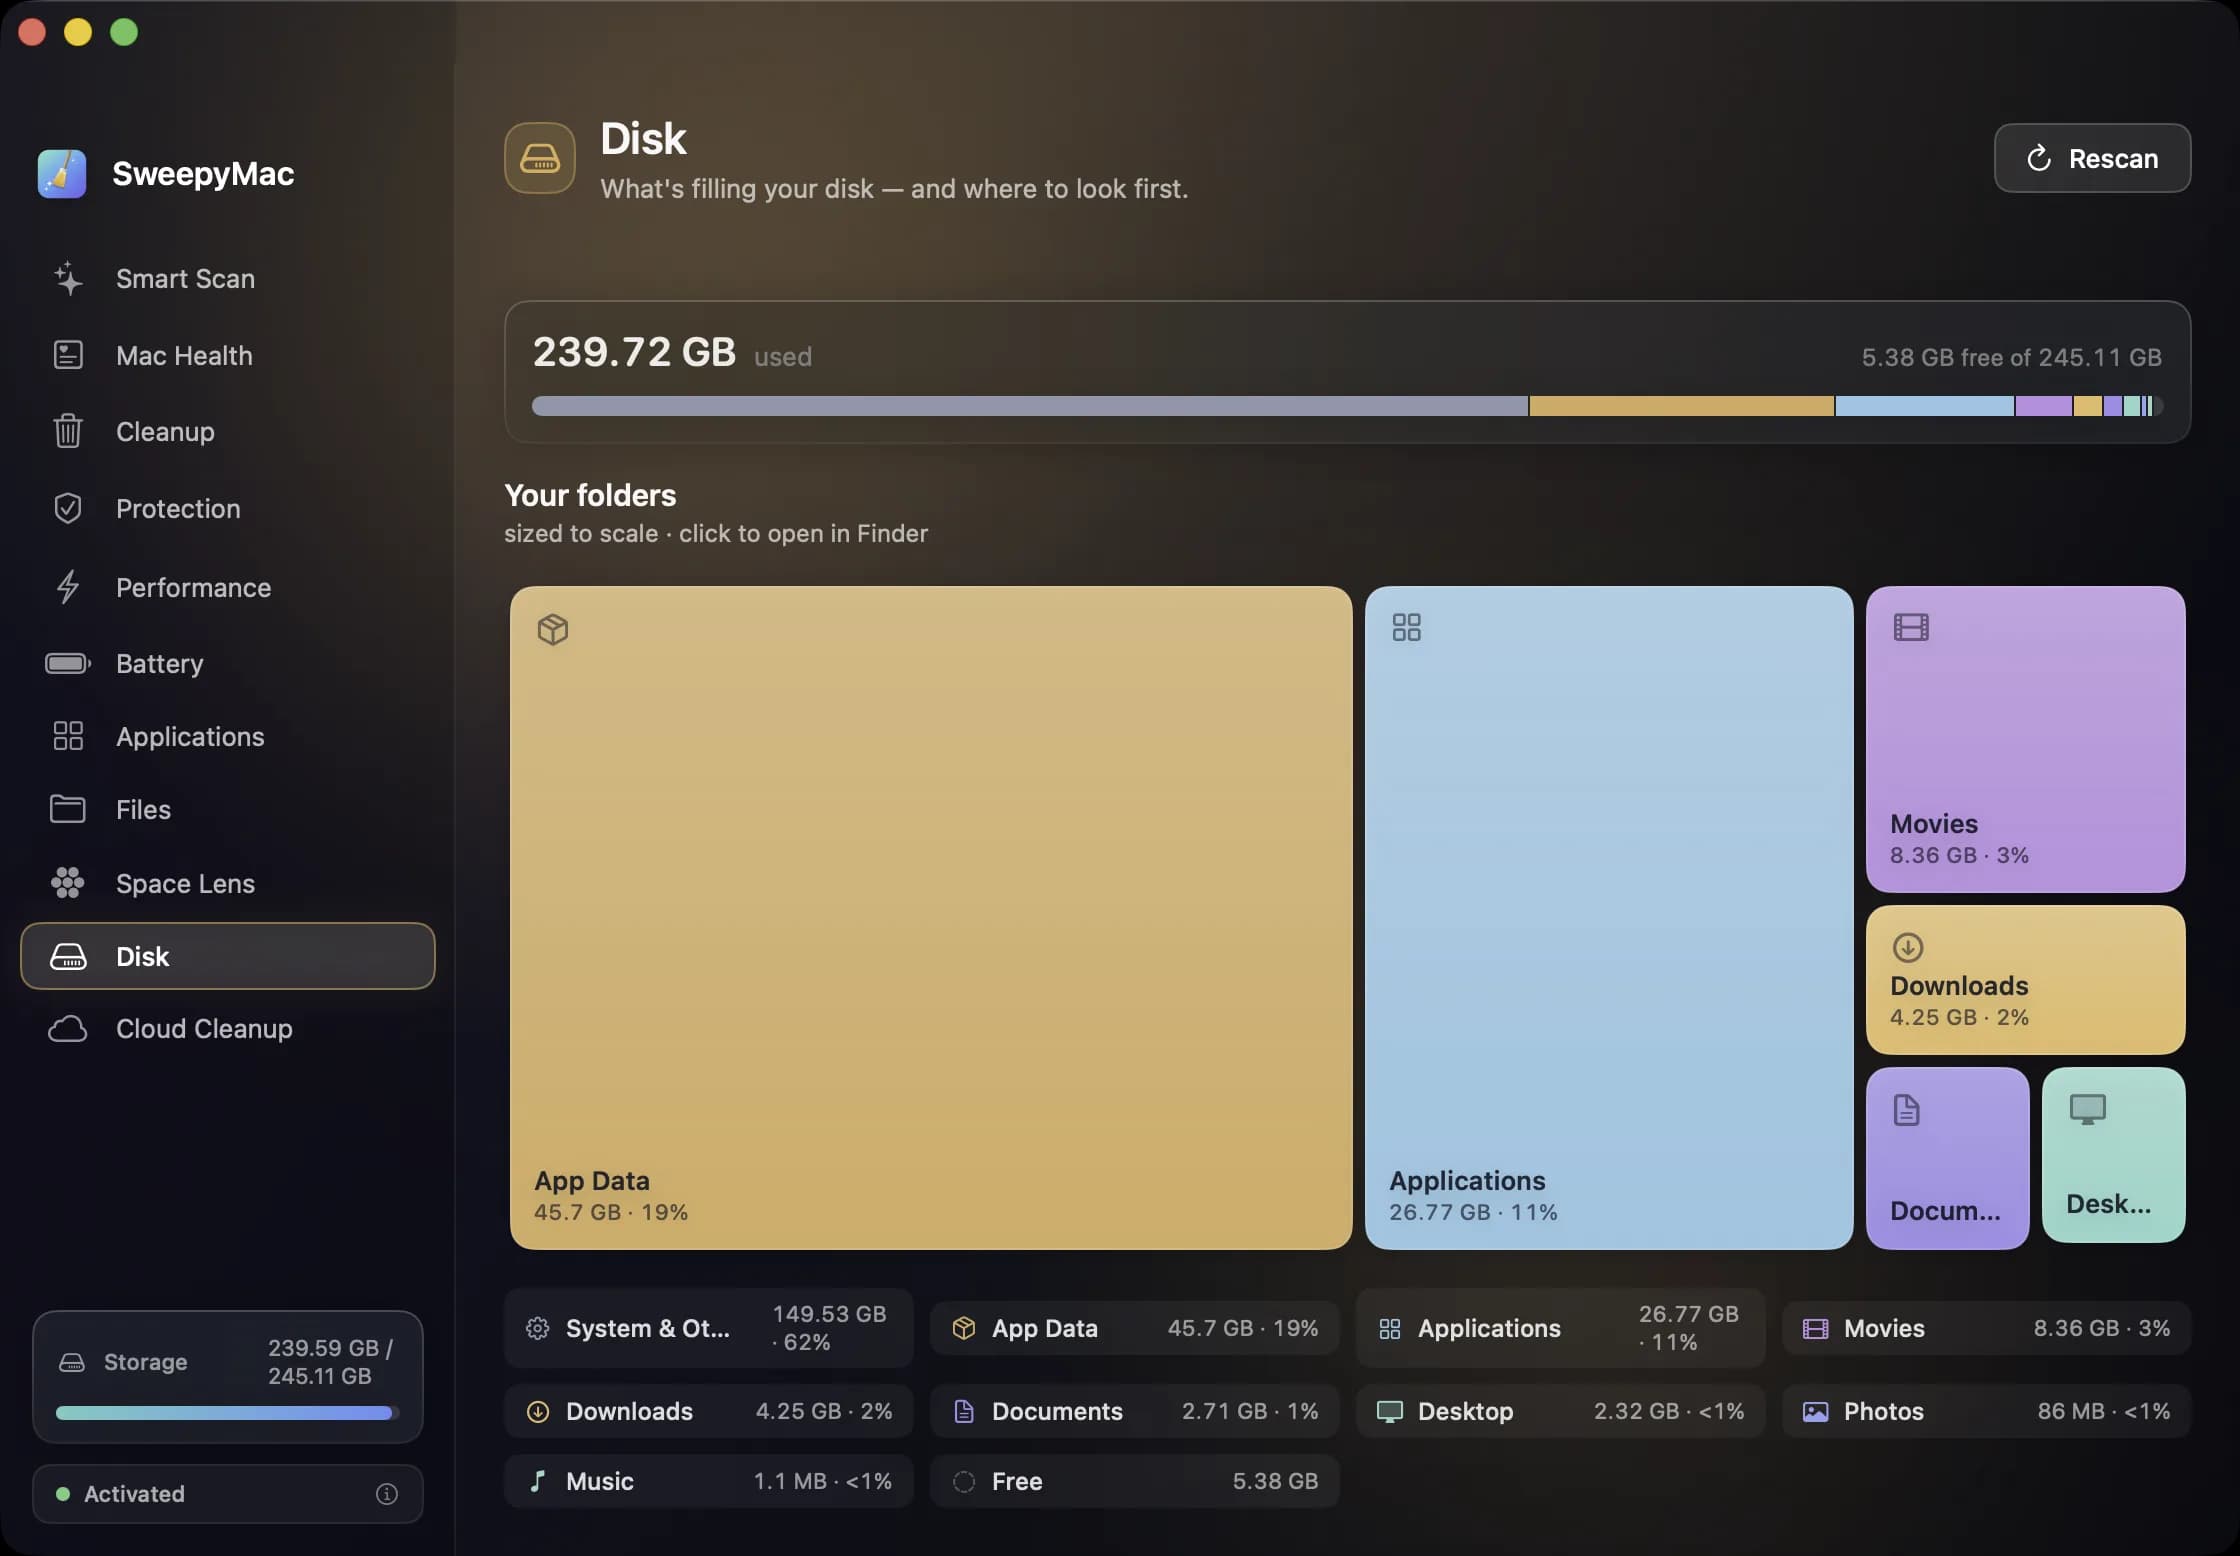
When macOS tells you the disk is almost full, the temptation is to start deleting the first big thing you see. That is how people lose the folder they actually needed. A better approach is a fixed order: look first, then take the safest space back, then the larger and riskier wins, and only then make anything permanent.
This is that order, using SweepyMac for most of it and Stackyard for the developer folders.
1. Look before you touch anything
Spend two minutes finding out where the space actually went. The answer is often surprising: a forgotten folder of screen recordings, a virtual machine image, a phone backup, an .android folder from one weekend of app development.
SweepyMac's Disk module draws the whole volume to scale, split into Applications, Photos, Movies, Music, Downloads, Documents, Desktop, App Data and System & Other. It is read-only, so nothing can go wrong there. Space Lens is the close-up: a live bubble map of a folder you can click into while it is still measuring. If you are a developer, also open Stackyard's Storage Map on your home folder, because that is where hidden dot-folders like .nvm and .cargo show up as the big tiles they are.
The post on Space Lens and Disk covers both views.
2. Take the safe wins
Run SweepyMac's Smart Scan (⌘1). It sweeps user caches, application logs and saved app state, the categories that are safe on any Mac, and totals what can be reclaimed. Only those conservative categories are pre-selected. On a Mac that has not been cleaned in a while this is often a few gigabytes, and it is the lowest-risk space you will get back.
The Smart Scan or Cleanup post explains what the fuller Cleanup module adds.
3. Give space back to iCloud
If you use iCloud Drive, some of the space on your Mac is local copies of files that are already safely in iCloud. Cloud Cleanup removes those local copies. The files stay in iCloud, the Finder still lists them, and opening one downloads it again. Only fully uploaded files are touched.
Note that this one is not Trash-based, so the space comes back immediately and there is no Undo; opening the file is how you get it back. The iCloud Drive post covers when it is worth doing.
4. Clear what your tools rebuild
For developers this step is usually the biggest. Xcode DerivedData, package manager caches and the node_modules of projects you have not opened since spring can easily add up to tens of gigabytes, and every byte of it is rebuilt by your tools the next time it is needed.
Stackyard's Dev Caches tab measures them and Select All Safe ticks everything that rebuilds on its own. Then turn on Stale in Projects to find projects untouched for thirty days or more, and clear their build folders. The dev caches post has the full list of what it covers and what it never touches.
5. Go after the big files
Now look at what is actually yours. SweepyMac's Large & Old scanner takes a folder, a size floor and an age, so "files over 500 MB I have not opened in a year" is three settings. Duplicates finds byte-identical copies and keeps the oldest of each set for you.
This is the step that needs your judgement, because these are your files, not caches. Go through the list rather than ticking everything. The posts on large and old files and duplicates explain what each one skips and why.
6. Remove the apps you no longer use
Apps you installed once and forgot are often large, and dragging them to the Trash leaves their caches and support files behind. SweepyMac's Applications module lists every app with its size, sortable, and removes each one with its leftovers. Sort by size and start at the top.
7. Empty the Trash, last
This is the step people miss. Everything SweepyMac and Stackyard remove goes to the Trash, because that is what makes their mistakes recoverable. But files in the Trash still take up space. Until you empty it, your disk is exactly as full as it was.
So once you have finished, and ideally after a day or two of using your Mac normally to make sure nothing you need went with it, empty the Trash. SweepyMac's Cleanup screen has a Trash card showing what is in it, with an Empty Trash button. It is the one permanent step in the whole process, and it asks first.
How much space is enough?
SweepyMac's health check stops warning once the disk is below 90 percent used and has at least 8 GB free. That is a floor, not a target. Leaving some room beyond it gives macOS space for updates and swap, and saves you from doing this again next month. For keeping it that way, see our monthly routine.
Questions people ask
- I cleaned gigabytes but my free space did not change. Why?
- Because SweepyMac and Stackyard move what they remove to the Trash, and files in the Trash still take up space. The space comes back when you empty the Trash.
- Is it safe to delete caches?
- The caches SweepyMac pre-selects are, because apps rebuild them as needed. The first launch of an app afterwards can be a little slower while it does.
- What is System & Other in the Disk view?
- Everything SweepyMac cannot attribute to a named category, including what macOS itself keeps. Rather than guess at it, the Disk view folds any unmeasurable remainder in there.
Related reading
- Why is my Mac slow? A six-point checklist, in the order worth checkingA slow Mac is almost always one of six things: memory pressure, one process burning the processor, a nearly full disk, too much starting at login, weeks without a restart, or dev processes nobody is watching. How to tell which, and where SweepyMac and Stackyard show it.
- SweepyMac and Stackyard on the same Mac: where they overlap, and which to reach forBoth clean caches, both find duplicates and big files, both uninstall apps properly, and both send everything to the Trash. Tool by tool, where the two apps do the same job, where one goes further, and which one a developer actually needs.
- The Mac Health score, explained: every number, every thresholdSweepyMac sums up your Mac as one score out of 100. This is what goes into it, exactly when each recommendation fires, and why a check that cannot read its data is skipped rather than marked fine.
Have a question about any of this?
Write in. The person who built the apps reads every message and replies within two working days.